{{ post.title }}
글 편집
글 편집 (이전 에디터)
{{ post.author.name }}
Posted on
| Version | {{ post.target_version }} | Product |
{{ product.name }}
|
|---|---|---|---|
| Tutorial/Manual | {{ post.manual_title }} | Attached File | {{ post.file.upload_filename }} |
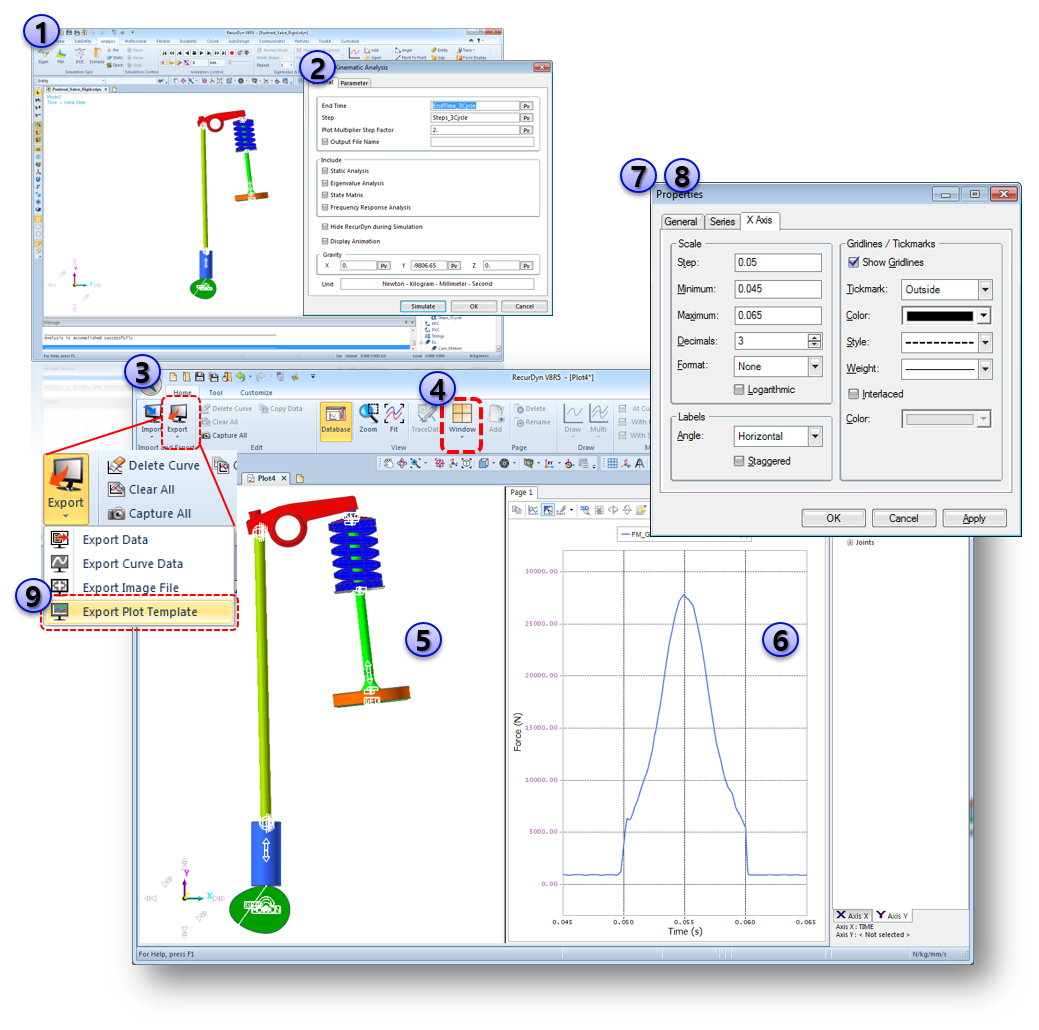
Step 01 – Create Plot Template File
- Open 'Pushrod_Valve_Rigid.rdyn'.
- Run the simulation.
- Run the Plot windows.
- Divide the Plot windows as desired.
- Load an animation on the Left Pane.
- Draw a curve with CamLine2D1 FM on the Right Pane.
- Open ‘X Axis’ property dialog box.
- Edit ‘X Axis’ properties as below:
- Step : 0.05
- Min : 0.045
- Max : 0.065
- You can change more options as desired.
9. Run 'Export Plot Template'
Edit the Plot window settings as desired as well.
Step 02 – Apply Plot Template File
[Steps]
- Return to 'Pushrod_Valve_Rigid.rdyn‘.
- Re-simulate the model after changing Spring Force Stiffness Coefficient value.
- Define the 'Template Settings' in the Analysis Tab > Plot Group > Template using a saved Plot Template file in the previous Step 01.
- Click 'OK' button.
Once you define the 'Template Setting', you can use the same plot settings every times. For this, return to the default plot settings and turn off the 'Use the Default File' option in the Template Setting dialog.

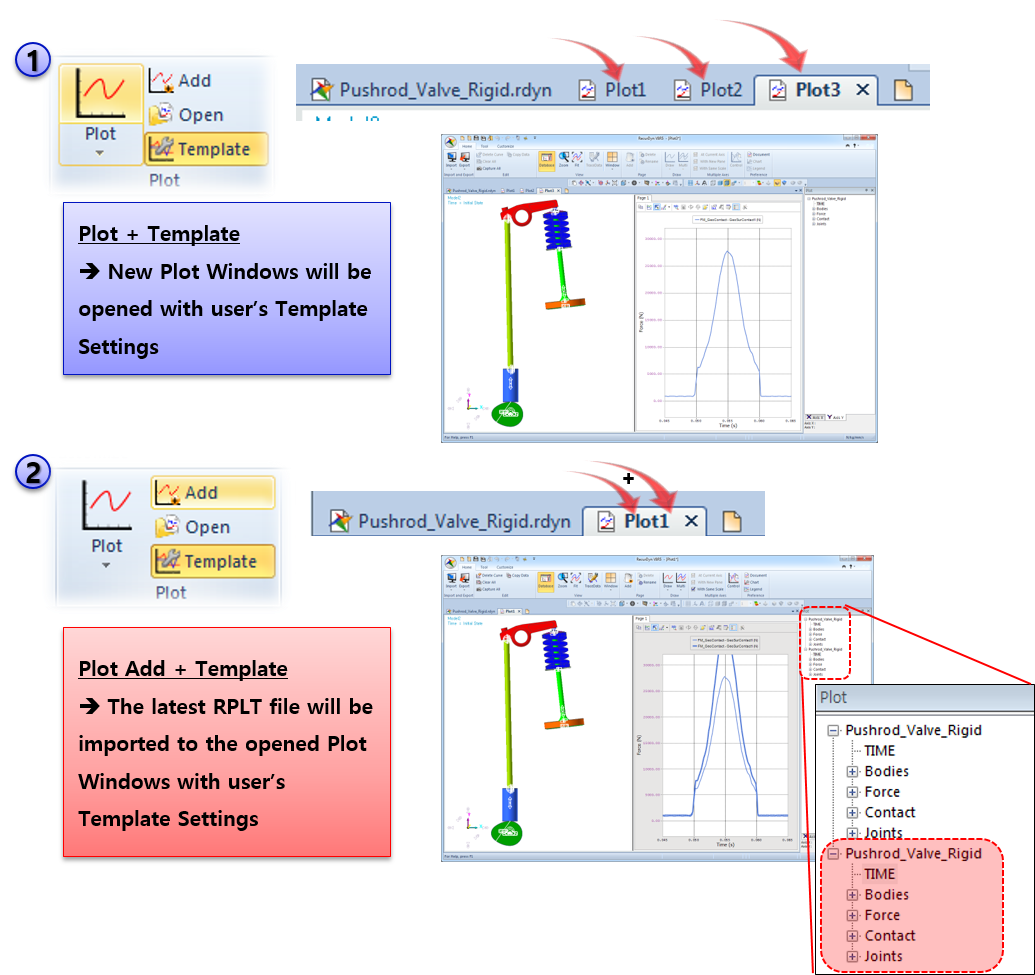
Step 03 – Run Plot Window with Template
[Steps]
There are two ways to open Plot Window with Template.
- The first way is to open New Plot Window with Template. When you run Plot, RecurDyn will open the new Plot window each time.
- The second way is to open an opened Plot window and add the lastly simulated RPLT file on that Plot. Therefore you can easily compare the results between the previous and current Plot results using this way.
The animation results can be also re-imported from the results of the latest model.